Four Steps to Sizing Roof Drains


Getting water off a building’s roof is important, but how do you know what size drain to use to provide adequate drainage? Using tools from the International Plumbing Code (IPC) it’s not that hard. IPC provides four steps to size the roof drains on a building:
Determine 100-year, 1-hour rainfall rate used for location of building
Select number of roof drains and calculate the roof area sloped to each drain
Size horizontal storm drainage piping
Size vertical storm drainage piping
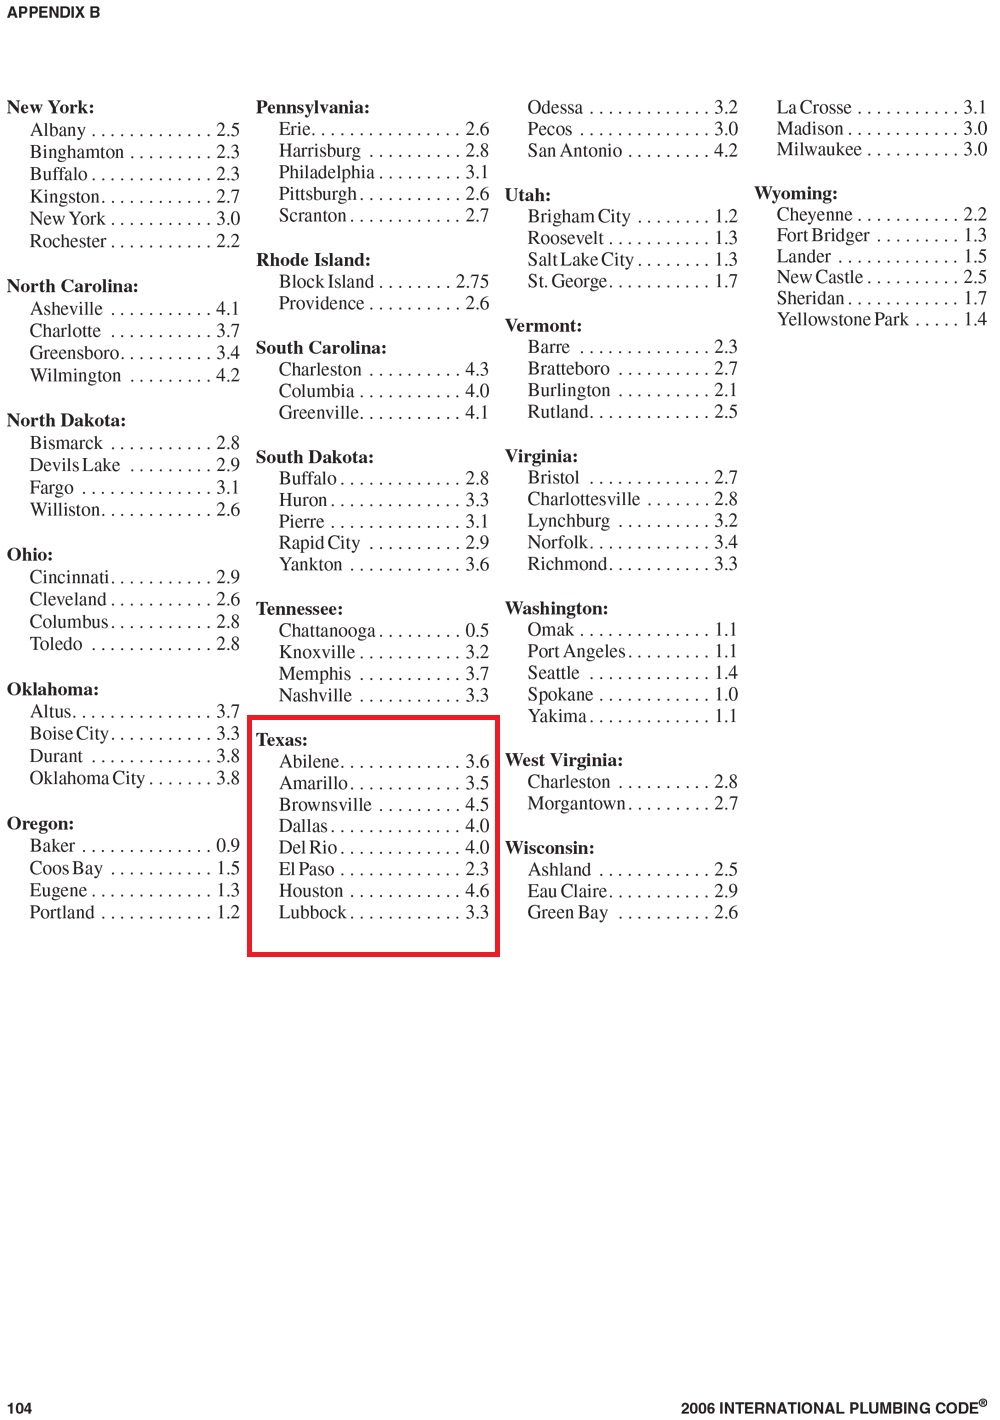
Appendix B in the IPC provides rates of rainfall for various U.S. cities based on inches per hour that may fall during a storm of one-hour duration and a 100-year return period. In other words, a storm so severe and with so much rain it will only occur once in 100 years. The goal is to plan for the absolute worst and be able to easily accommodate the typical rainfall amounts.
The number of drains can vary and you can increase the number of roof drains to select smaller diameter roof drains. In addition to the primary roof drains, there will also be overflow drains, which are used for redundancy and sized in the same manner. These drains are distinguished by having higher rims. As we will see in Steps 3 & 4, the size of the roof drain lines is dependent on the square feet of the roof area being served by each roof drain. You also must include half of the area of any vertical walls that may divert rain to the roof. Determining the exact roof area and the number of drains is precise work, so it requires coordination with the building’s architect.
It’s easier to see how this works with a real world example. Assume you are tasked to size a horizontal roof drain serving 5,000 square feet of roof area on a building located in Dallas, TX. When you consult Appendix B of the 2006 IPC it shows a rainfall rate of 4” per hour in Dallas (See figure1). But don’t stop there; always check for code amendments from the city. When you do this, you will discover that Dallas building code requires a 6” per hour rainfall rate for storm drain calculations.
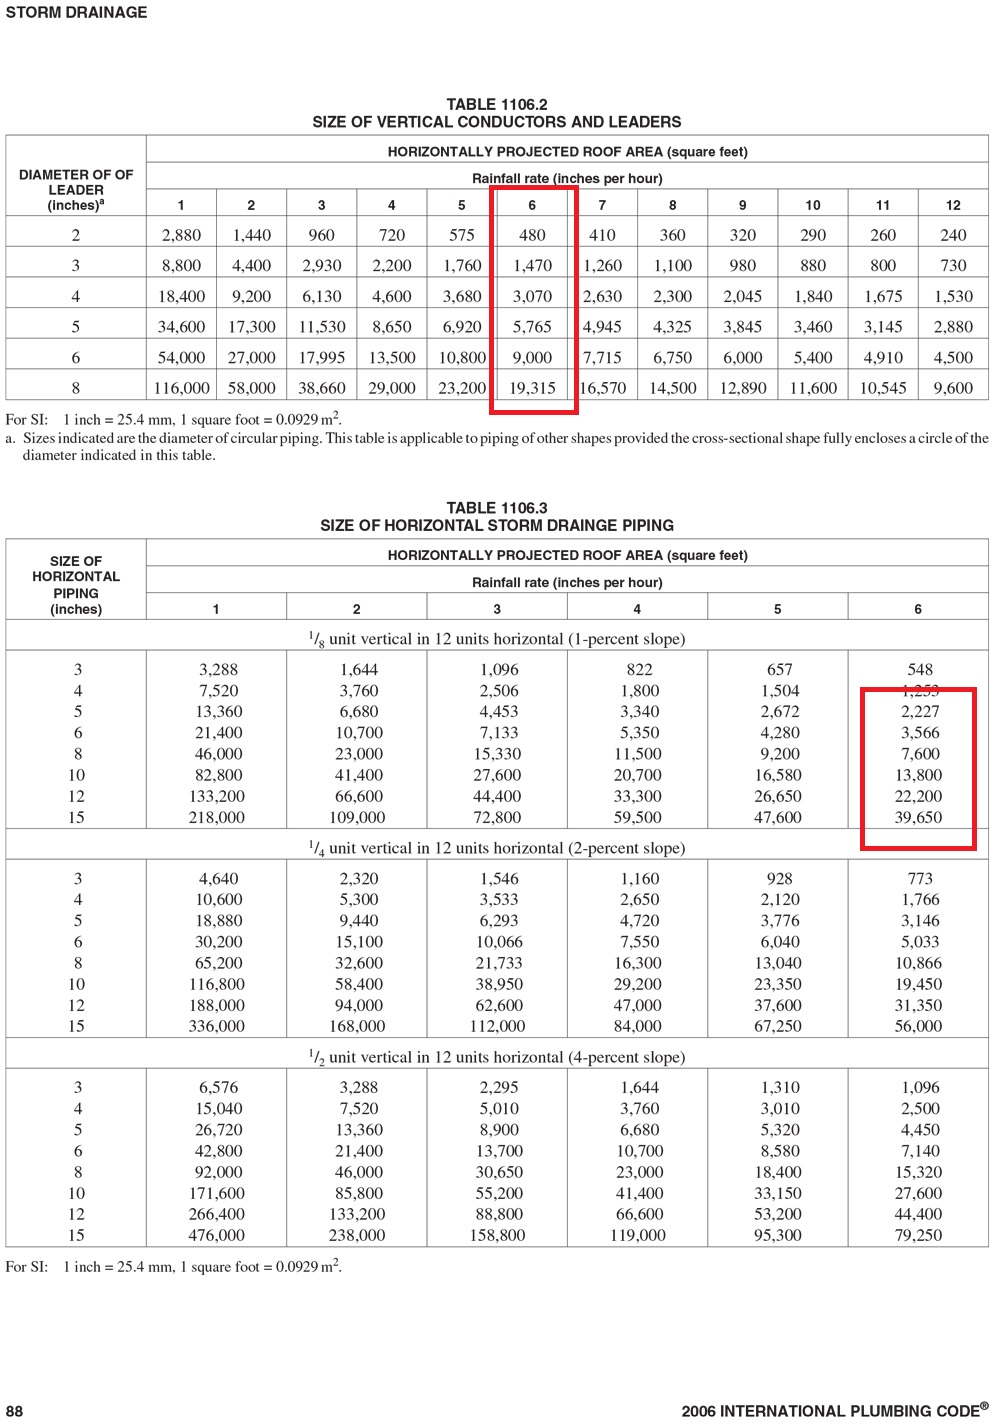
The next step is to consult Table 1106.3 (Figure 2) to learn the required size of pipe. According to the chart, for 1/8” slope per 12” of pipe, for 5,000 square feet of roof area, with a 6” per hour of rainfall, the required pipe size is 8”.
To size the vertical roof drain for the same parameters – 5,000 square feet of room area and 6” per hour of rain – consult Table 1106.2(Figure 3). This reveals that the minimum size for the leader pipe is 5”. But this isn’t the whole story. Section 101.5 of the IPC tells us not to reduce the pipe size in the direction of flow. This means that because our horizontal pipe from Step 3 was 8” our vertical pipe will be also 8”.
Adequate drainage is an important component of a properly installed roof, so installing the correct size of drains is essential. Following these four steps you can successfully specify the correct size of horizontal and vertical drains required for any roof.

Get the scoop on shut down coordination in manufacturing plants.